Web server에서 CGI는 하나의 요청(request)에 하나의 프로세스를 생성한다. 이것은 프로세스를 생성하고 제거하는 과정에서 많은 부하가 발생하기 때문에 성능이 느릴 수 있습니다. 이를 개선한 것이 'FastCGI'입니다.
FastCGI는 요청이 있을 때마다 프로세스가 만들어지는 것이 아니라 만들어진 프로세스가 계속해서 새로운 요청들을 처리하여 프로세스를 생성하고 제거하는 부하를 줄일 수 있습니다. 개념은 아래 lighttpd 문서를 참고해주세요.
* 출처: /usr/share/doc/lighttpd/fastcgi.txt
CGI programs have the problem that they have to be restarted by the webserver for every request which leads to really bad performance values.
FastCGI removes this limitation by keeping the process running and handling the requests by this always running process. This removes the time used for the fork() and the overall startup and cleanup time which is necessary to create and destroy a process.
1. lighttpd 에서 fastcgi 모듈 enable
lighttpd에서 lighty-enable-mod 명령어를 사용해서 fastcgi 모듈 enable 합니다.
#fastcgi 모듈 활성화
$ sudo lighty-enable-mod fastcgi

#conf 변경 내용 확인
server.modules 에서 mod_fastcgi 가 추가되어 enable 되어 있습니다. (공식 문서 링크)
$ cat /etc/conf10-fastcgi.conf

2. hello_fastcgi.fcgi 실행 파일 만들기
fastcgi를 C 언어로 컴파일하기 위해서는 PC에 libfcgi-dev를 설치하고나 소스(링크)를 받아서 컴파일 후 설치해야 합니다. libfcgi 를 apt 명령어를 사용해서 설치합니다. libfcgi 가 설치가 안되어 있다면 소스 코드 컴파일 시 #include <fcgi_stdio.h> 에서 컴파일 에러가 발생합니다.
#로컬 PC에 libfcgi 설치
$ sudo apt install libfcgi-dev

아래와 같이 C 언어로 코드로 작성합니다. ( 출처: https://github.com/jerryvig/lighttpd-fastcgi-c)
// Compile with: gcc hello_fastcgi.c -o hello_fastcgi.fcgi -lfcgi -O3 -Wall -Wextra -pedantic -std=c11
#include <fcgi_stdio.h>
#include <stdlib.h>

int main (void) {
    while (FCGI_Accept() >= 0) {
        printf("Status: 200 OK\r\n");
        printf("Content-type: text/html\r\n\r\n");
        printf("<!doctype><html><body>Hello from fastcgi with lighttpd!</body></html>\n");
    }
    return EXIT_SUCCESS;
}
# 실행 파일 이름을 hello_fastcgi.fcgi 으로 libfcgi lib를 link 합니다.
$ gcc hello_fastcgi.c -o hello_fastcgi.fcgi -lfcgi -O3 -Wall -Wextra -pedantic -std=c11
# fcgi 실행파일을 cgi-bin에 copy 합니다.
$ sudo cp hello_fastcgi.fcgi /usr/lib/cgi-bin/
* 코드 상에서 FCGI_Accept() 설명은 아래 내용을 참고해주세요.
The FCGI_Accept function accepts a new request from the HTTP server and creates a CGI-compatible execution environment for the request.
If the application was invoked as a CGI program, the first call to FCGI_Accept is essentially a no-op and the second call returns -1. This causes a correctly coded FastCGI application to run a single request and exit, giving CGI behavior.
If the application was invoked as a FastCGI server, the first call to FCGI_Accept indicates that the application has completed its initialization and is ready to accept its first request. Subsequent calls to FCGI_Accept indicate that the application has completed processing its current request and is ready to accept a new request.
In completing the current request, FCGI_Accept may detect errors, such as a broken pipe to a client who has disconnected early. FCGI_Accept ignores such errors. An application that wishes to handle such errors should explicitly call fclose(stderr), then fclose(stdout); an EOF return from either one indicates an error.
After accepting a new request, FCGI_Accept assigns new values to the global variables stdin, stdout, stderr, and environ. After FCGI_Accept returns, these variables have the same interpretation as on entry to a CGI program.
In addition to the standard CGI environment variables, the environment variable FCGI_ROLE is always set to the role of the current request. The roles currently defined are RESPONDER, AUTHORIZER, and FILTER.
In the FILTER role, the additional variables FCGI_DATA_LENGTH and FCGI_DATA_LAST_MOD are also defined. See FCGI_StartFilterData(3) for complete information.
The macros FCGI_ToFILE and FCGI_ToFcgiStream are provided to allow escape to native functions that use the types FILE or FCGI_Stream. In the case of FILE, functions would have to be separately compiled, since fcgi_stdio.h replaces the standard FILE with FCGI_FILE.
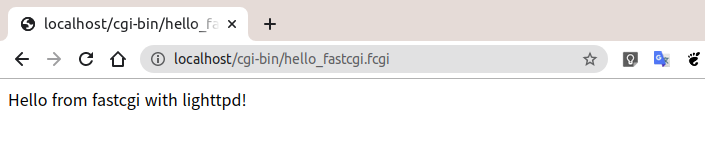
3. hello_fastcgi.fcgi 동작 확인하기
cgi 예제와 유사하게 http://localhost/cgi-bin/hello_fastcgi.fcgi로 접속하면 아래와 같이 결과를 얻을 수 있습니다.
※ Python FastCGI 설명
https://flask.palletsprojects.com/en/1.1.x/deploying/fastcgi/
관련 글
[개발환경/Web Server] - Web 서버 GET/POST CGI 사용법 (QUERY_STRING / CONTENT_LENGTH)
[개발환경/Web Server] - 우분투 20.04에서 lighttpd CGI 설정 방법 및 C와 Python 예제 코드
[개발환경/Web Server] - 우분투 20.04에서 lighttpd Web Server 설치 (Embedded용으로 활용 가능)
[개발환경/Web Server] - 우분투 20.04에서 Apache와 Tomcat 완전 삭제 방법
[개발환경/Web Server] - 우분투 20.04에서 Web 서버 설치 방법 (apache2, tomcat9)
[모바일 SW 개발/REST API] - Google Gmail API 사용 방법 (1) - Sample code
댓글